Its been quite some time I haven’t posted anything in Craft section. Last week I was thinking about it. Teacher’s Appreciation week went off too fast that, even if we made some crafts but, I actually couldn’t post anything. But yesterday, we did something new, creative, fun stuff and that gave me a reason to post. By ‘we’ I mean me and my daughter. Today, is her teacher’s birthday. She just adores her teacher. I got an email from the room mom about the birthday. My daughter knew before me about her teacher’s birthday. And yes, now she wanted to make something special. Her special pop up card…:)

All these occasions give children to explore new things and try out new stuff. In short, use their imagination and creativity. This time, I thought of letting her make a pop-up card. This was my first time I was making a pop-up card. In Austin, I used to go to Card making class where I learned lot of useful techniques from my wonderful and very talented teachers. I hope if my teacher check this post, she would like it. And my daughter’s teacher would have enjoyed seeing this pop-up card as much as she did making it.
You can make this card for any occasion. Father’s Day is coming, or Thank you card for teacher, or just a birthday card. Pop-up cards are a great twist on a ordinary greeting card. Pick the occasion, and give it a personalize touch by making something handmade.
You will need:
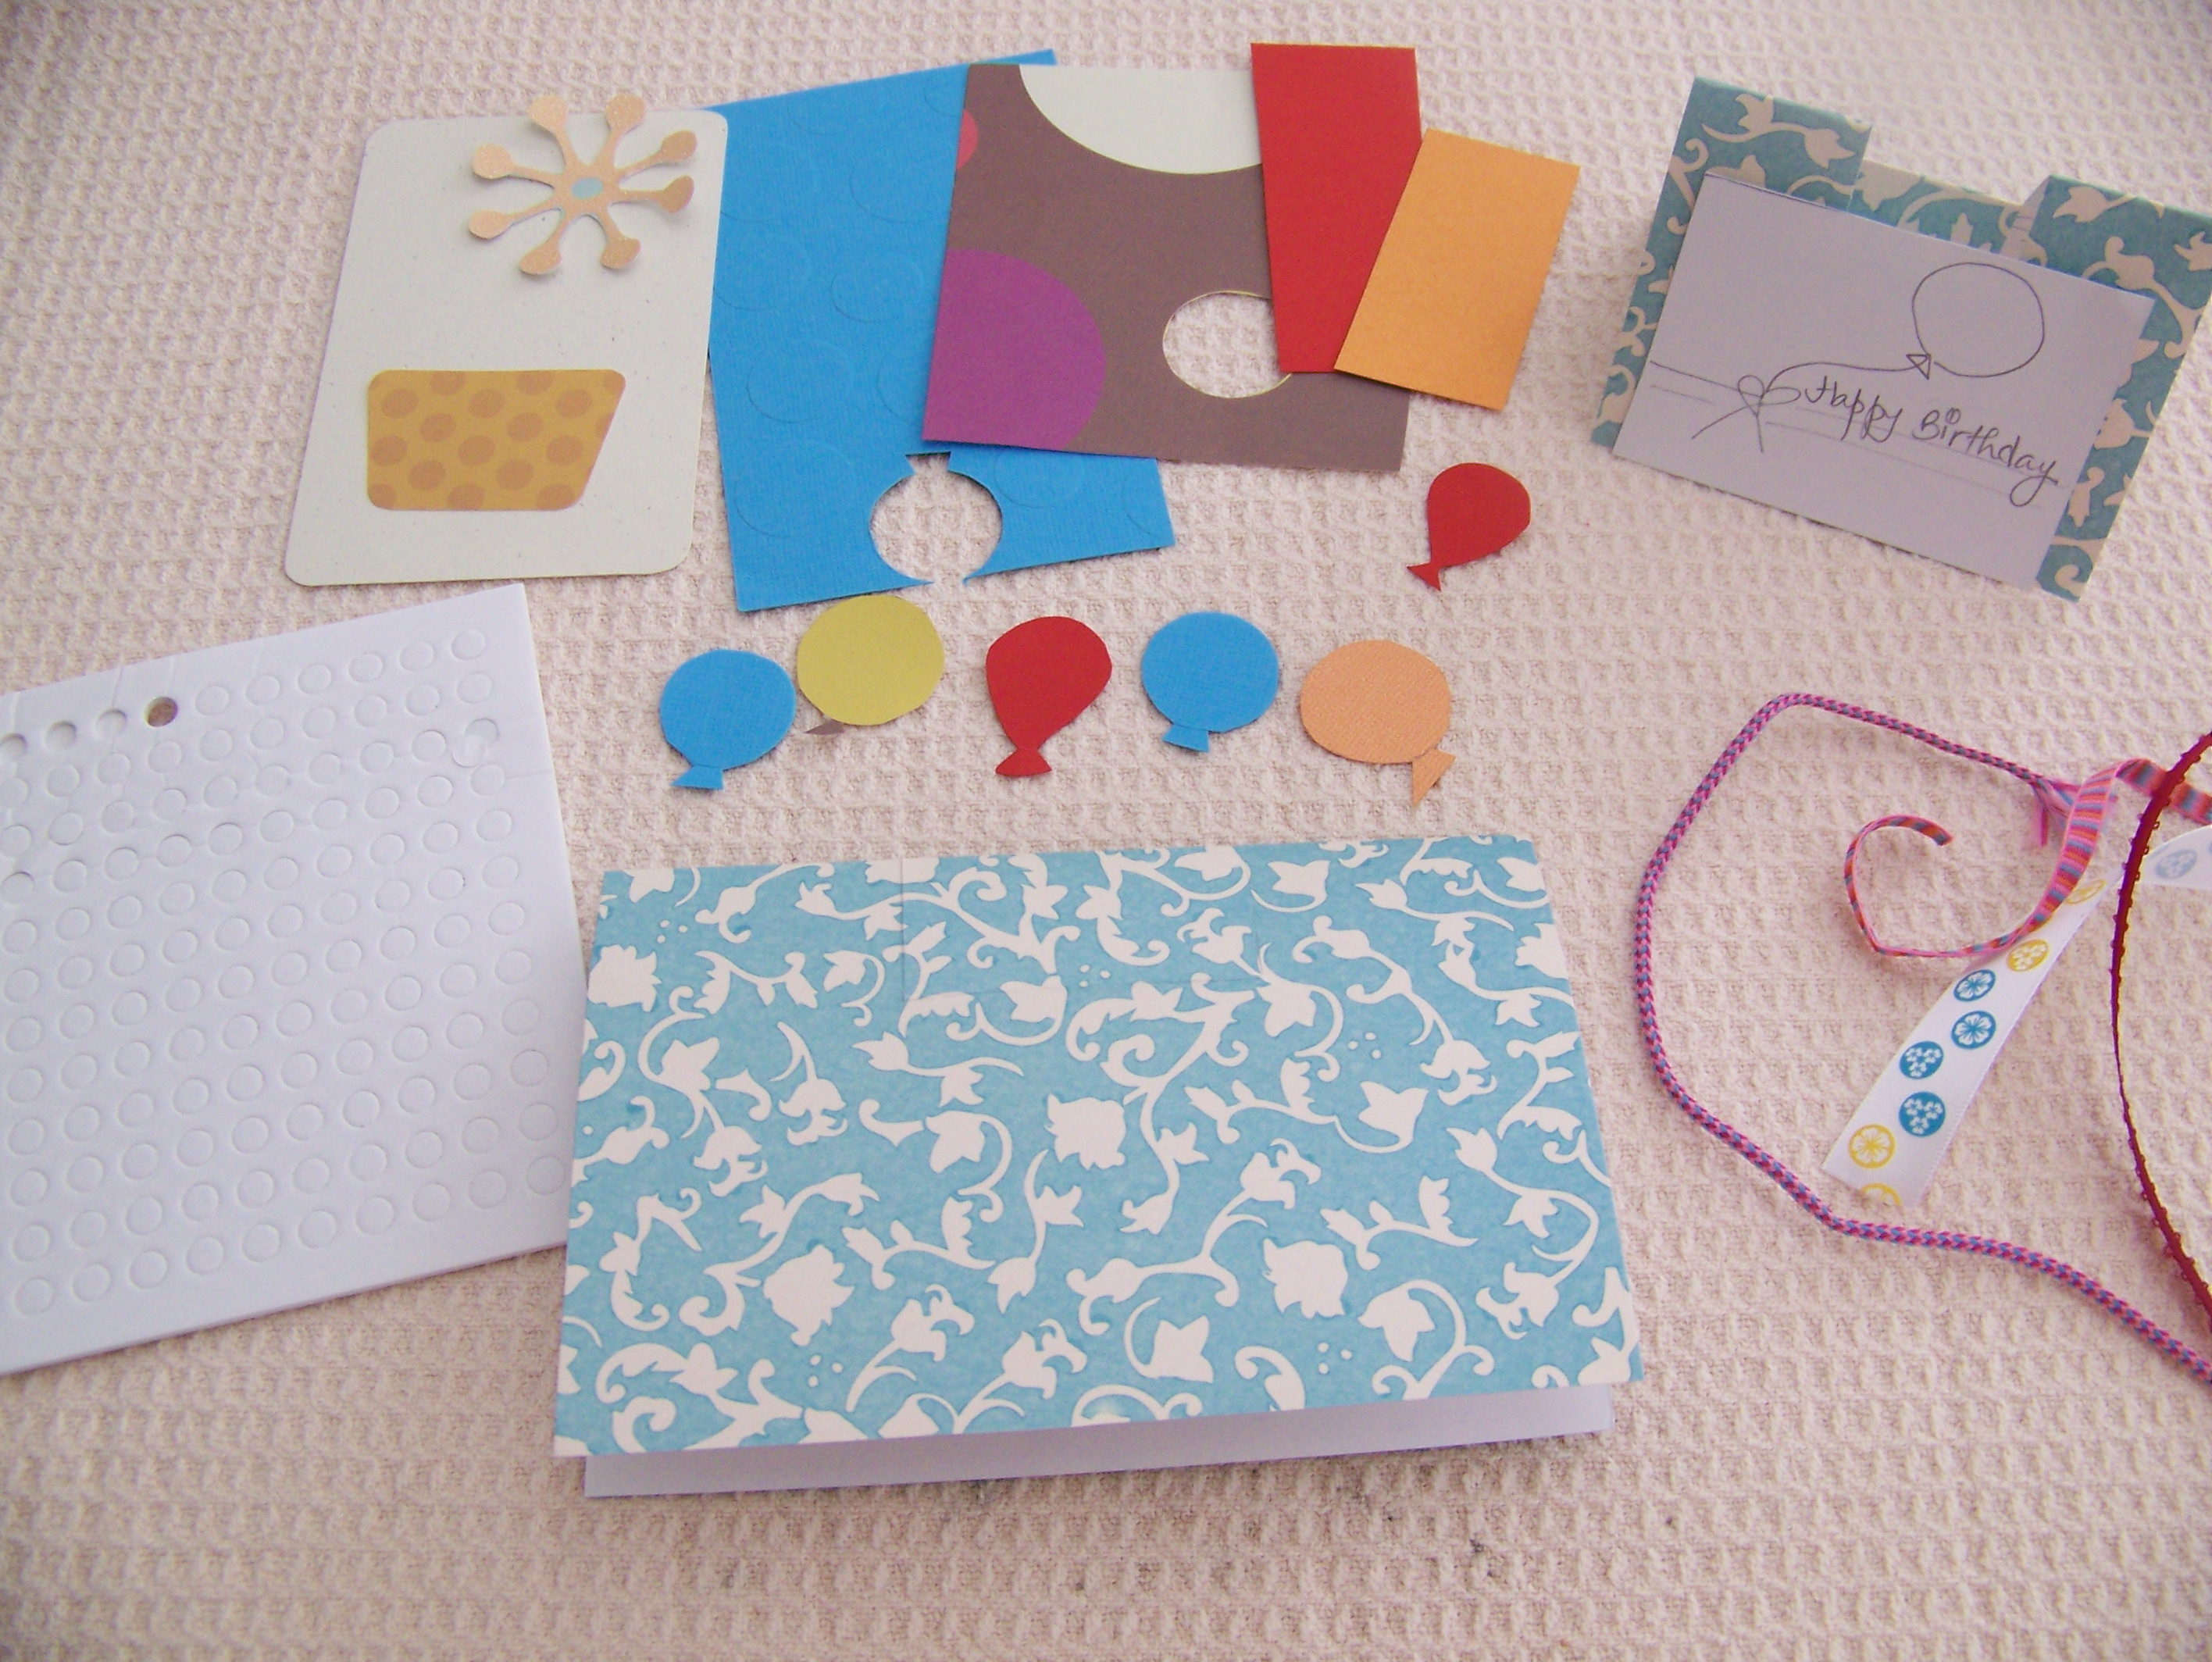
- Printed card stock: 6″x4″
- Plain card stock: 5″x3″
- Few colored strips: for balloons (you can use the scraps of different colors)
- Glue stick
- Pop-ups
- Foam sticker (optional)
- Colored crystal (optional)
- Ribbon : 2 pieces
- Sketch pens
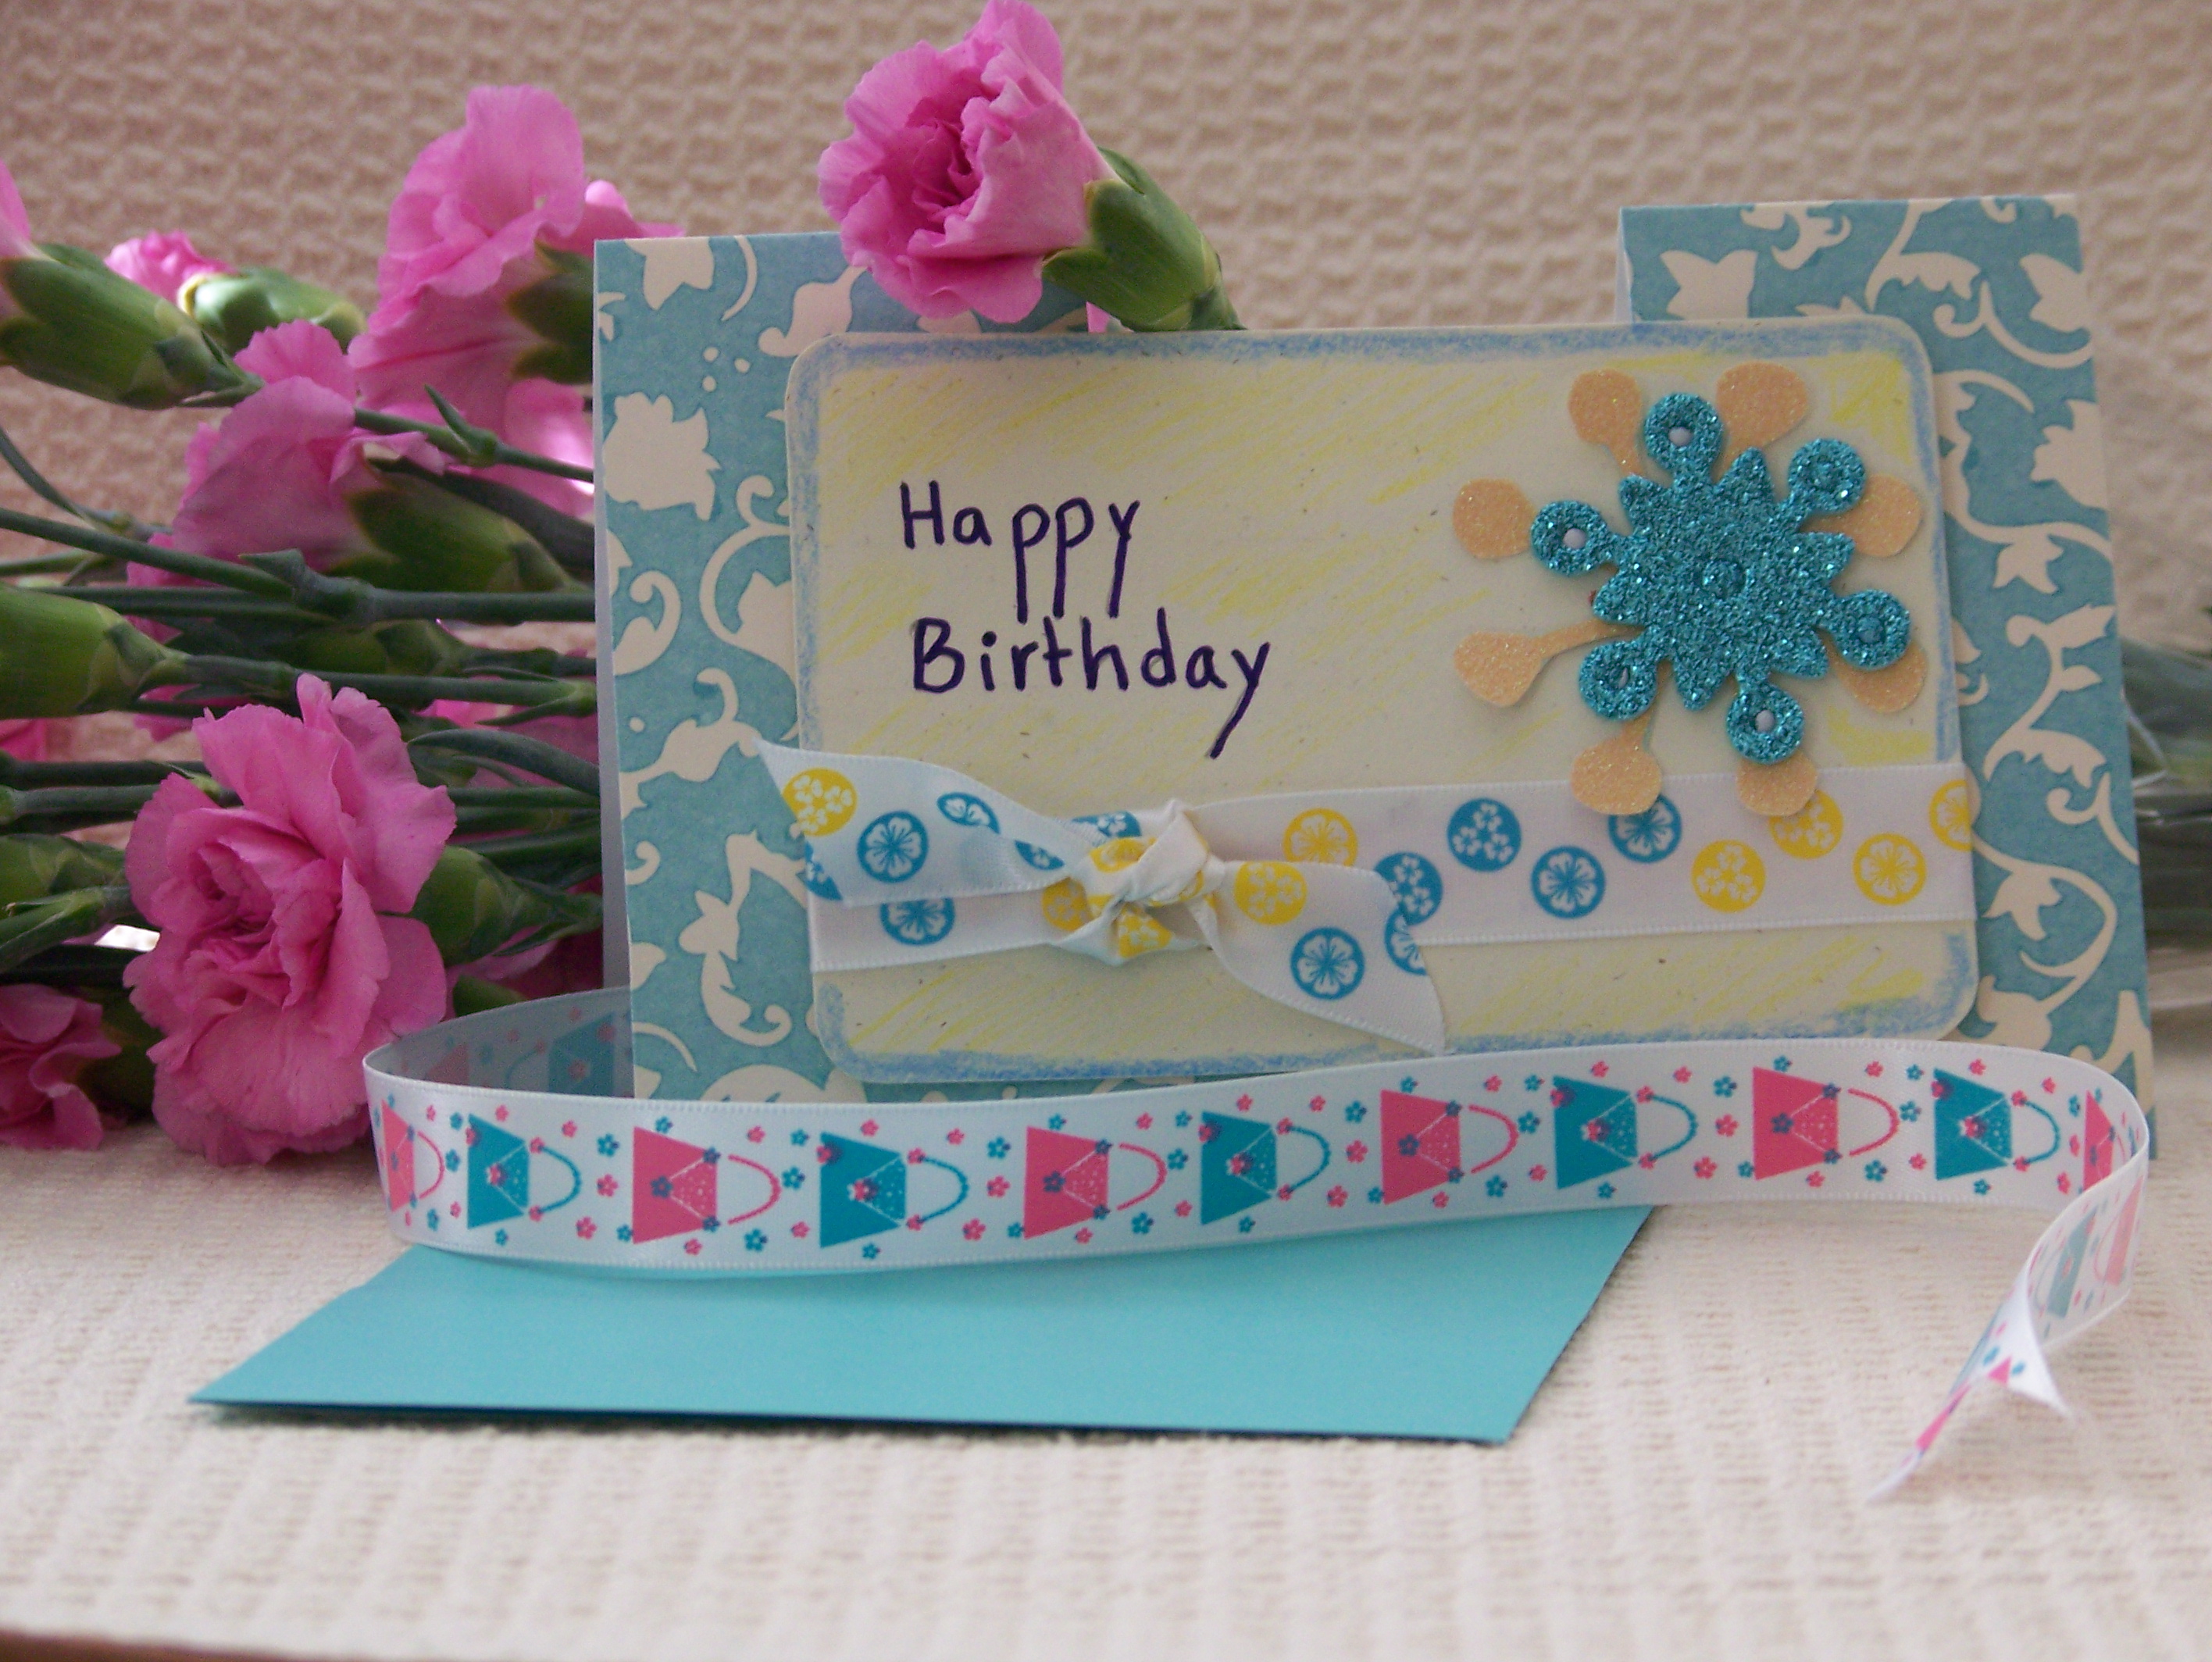
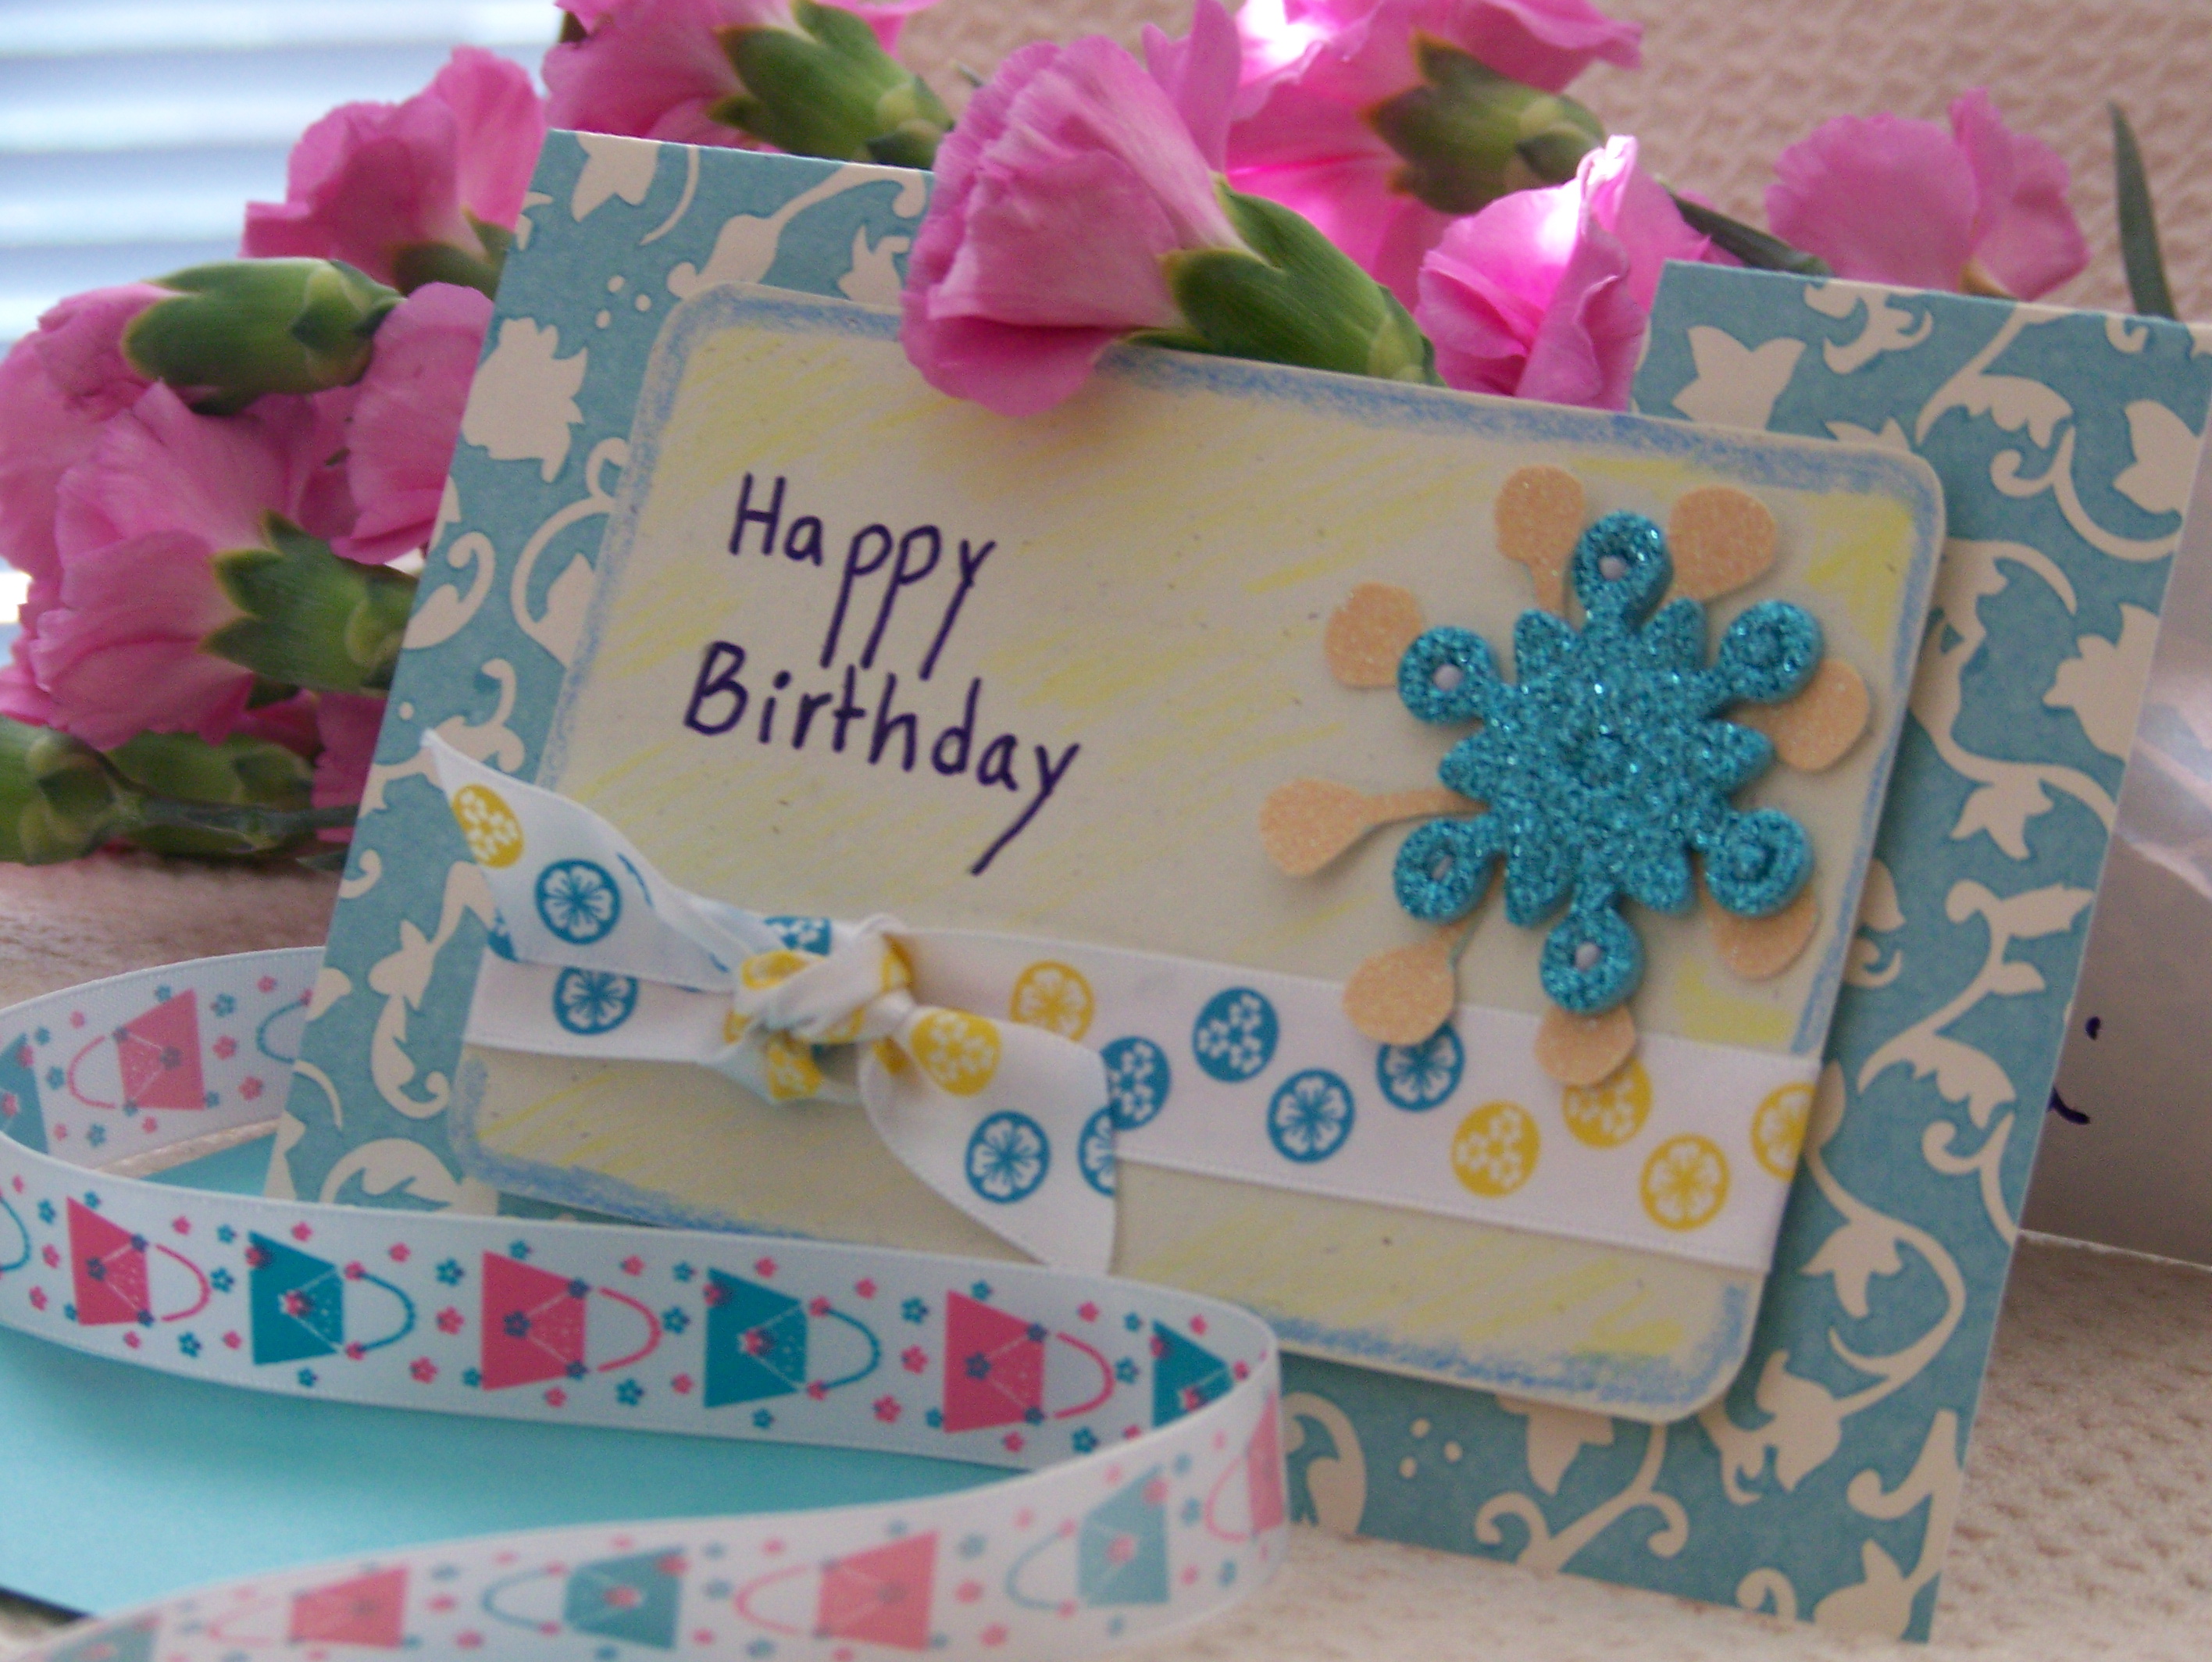
(The mini card that you see is my sample card)
Get ready for a pop-up card:
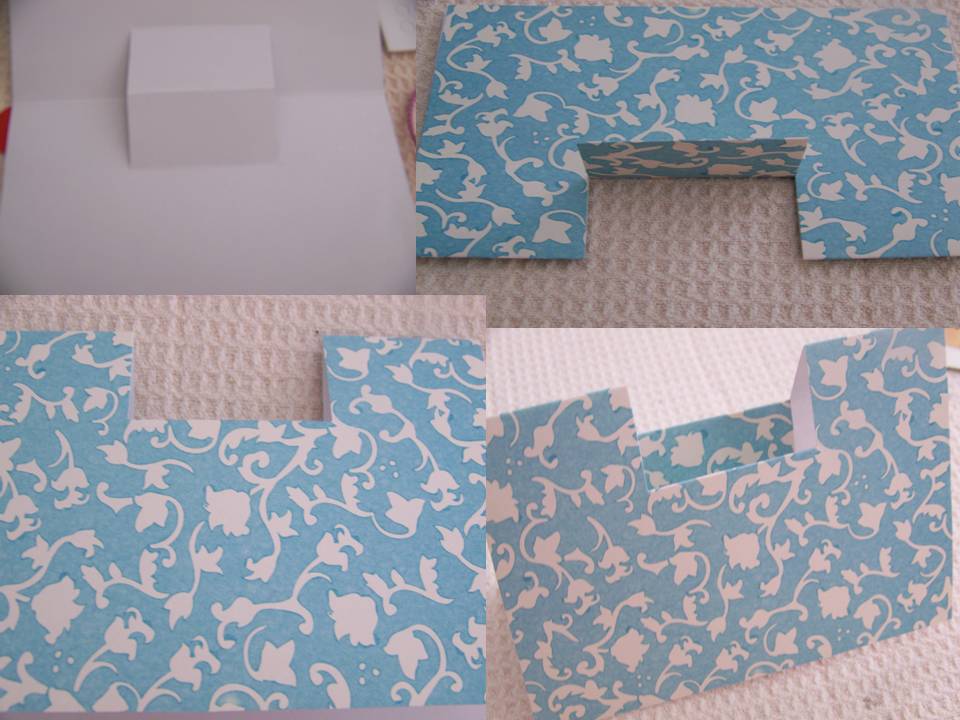
- Fold the printed card into half. Give it a firm crease with your fingernail.(I sometimes use a ruler’s edge)
- For making it a pop-up card, measure 2″ from both the sides. Mark a rectangle (2″x1″). Now cut the vertical line. The cut should be made in from the folded edge.
- Open the card and push the flap up toward you. Pinch the middle to crease it. This will be your stand for pop-up.
- Then all you do is create your “pop up” design, and attach it to the pop-up stand.
- For our design, we cut out balloons from the colored strips. If you have punches, it will be much easier and quick. Also you can do any shapes i.e flowers, hearts. We didn’t have much time and punches so cutting balloons was much easier and less time consuming….:)
- With the same strips, cut one small rectangle. We will use it for holding the balloons. Cut medium thin strips for balloons to stick on.
- Glue the balloons first on the pop stand/front of the pop-up (refer to the picture), now glue the rectangle.
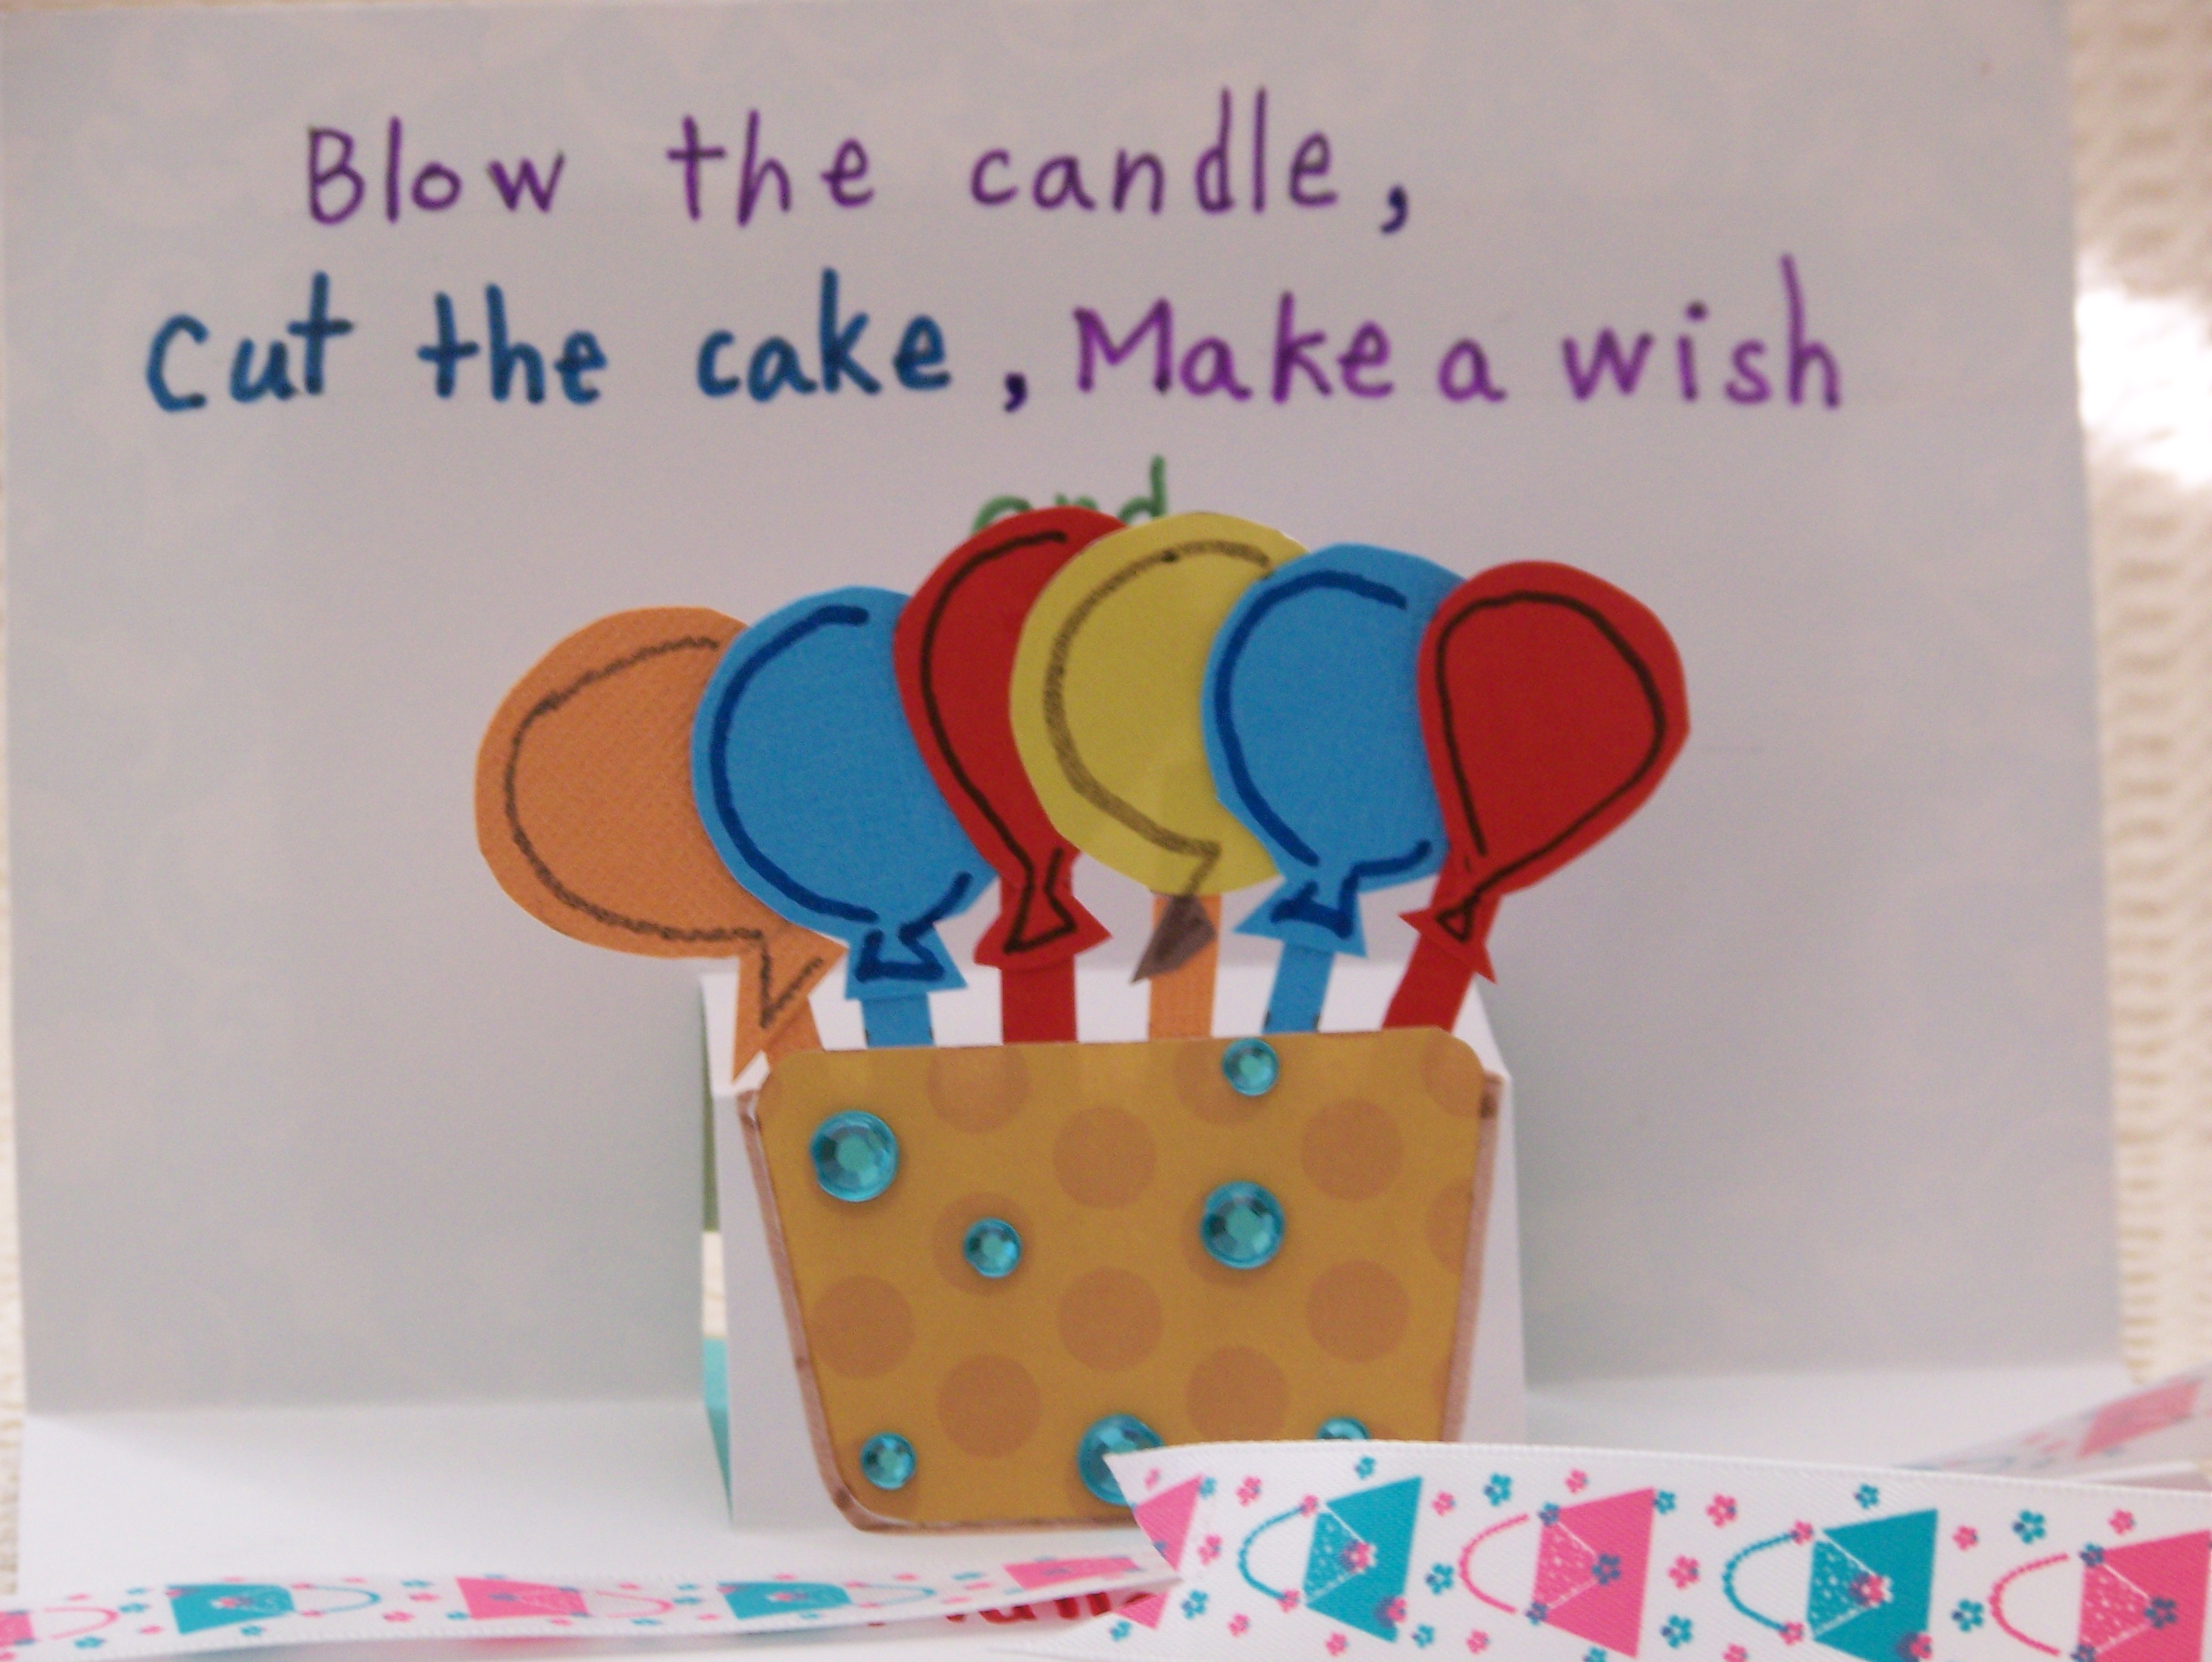
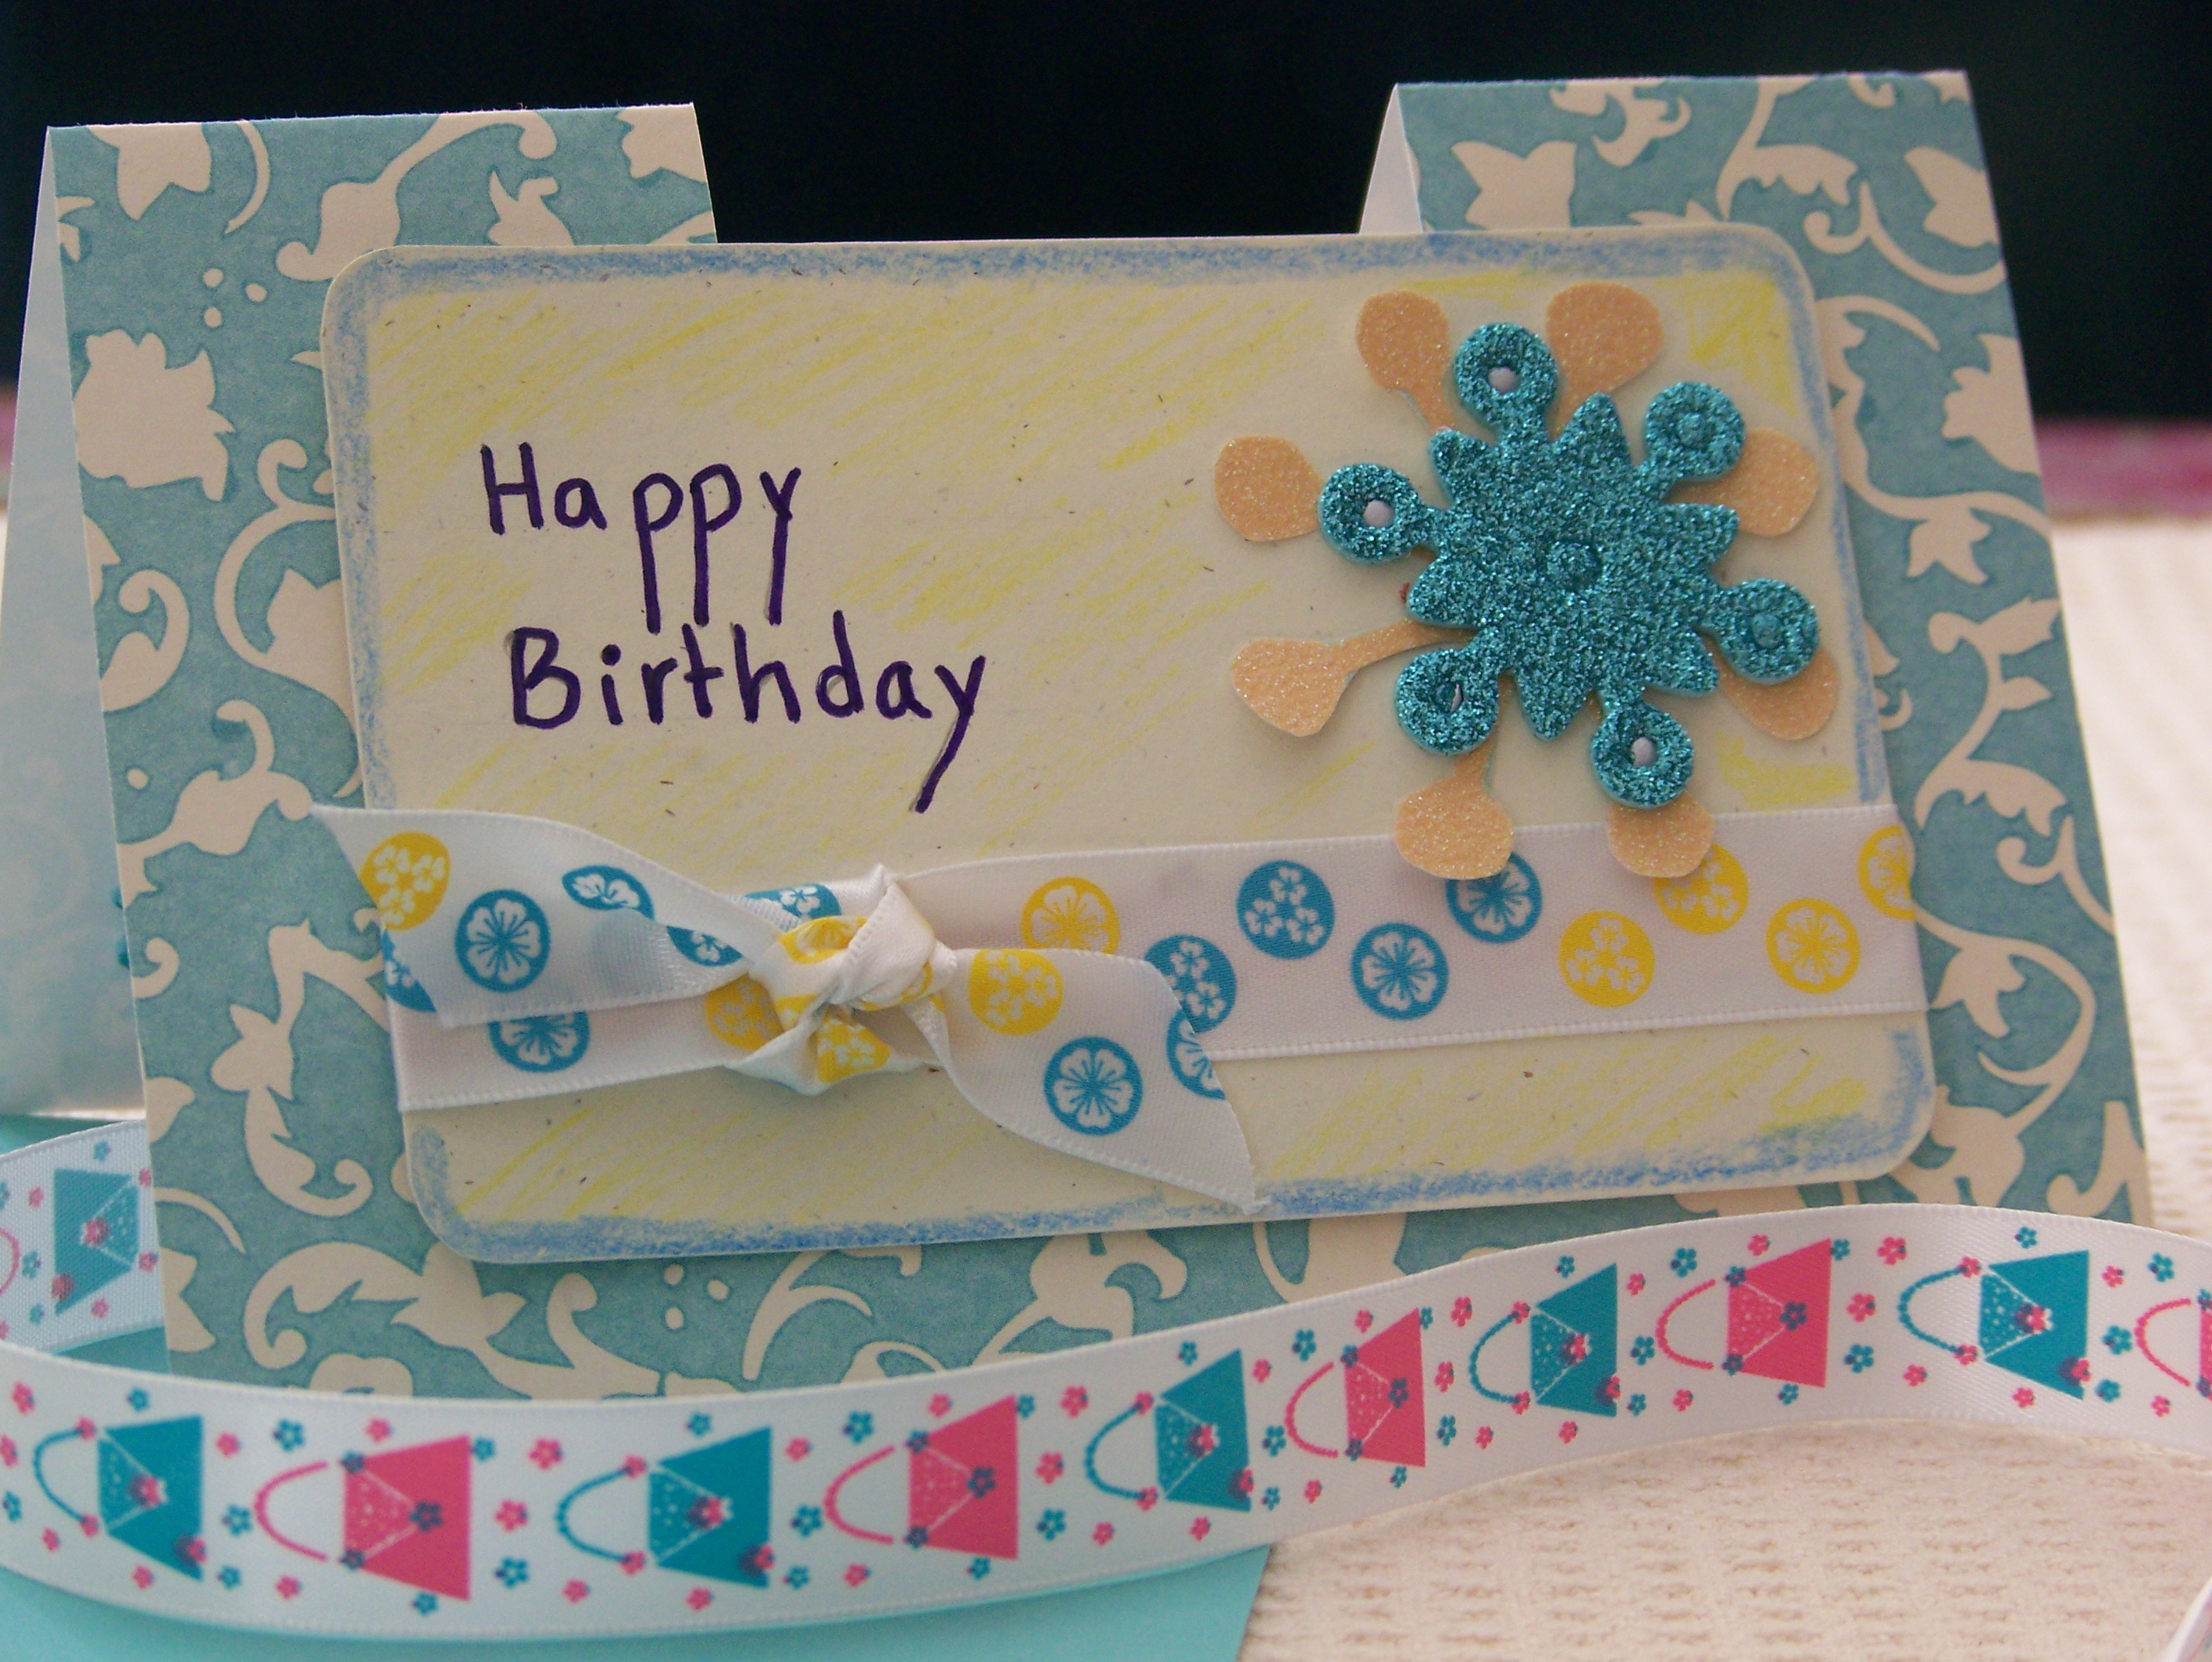
- Using pop-ups stick the white card on the main card. Tie a ribbon, decorate the white card as you like but don’t over-do it. We just used colored pencils. This gave it a dimension and at the same time wasn’t looking over decorated with embellishments.
- Write your message. My daughter wrote ‘ Blow the candle, Cut the candle, Make a wish & Celebrate!!’
Your pop-up card is ready!!