Keeping a toddler busy is a challenging task . Easy and fun craft projects comes handy to keep the toddler busy. Paper plate is not just a supply for serving food but a beginning of many fun craft projects. Foam sheets are the perfect material for younger kids. It is amazing to see how much you can create doing paper plate and foam craft. Today’s guest post is from Monica Oberoi, mom of a busy 2 1/2 years old who tries to come up with different fun activities to keep her little munchkin busy. Apart from doing Craft, she loves to bake (hoping to get a yummy cake recipe very soon..:) & travel.
You can make this paper plate and foam craft with your toddler for different occasions, seasons. If you are looking for an easy and inexpensive activity this spring or summer or just any regular day then these paper plate and foam craft is perfect for you.
Paper Plate Craft
Material Required: (you will get all the supplies at your local craft store)
- Foam Sheets
- Small Paper Plates
- Fuzzy Sticks
- Wobbly Eyes
- Pom Pom
- Glitter Foam Sheets/ Glitter Paper (pink, orange and Blue color)
- Black poster color
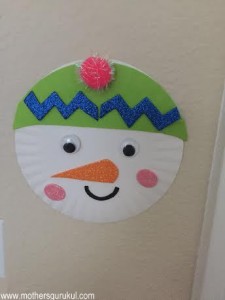
How to make Snowman:
- Cut out some small pink circles from glitter foam sheets.
- Cut nose from orange glitter foam sheet in a long beak kind shape.
- Make a zig-zag pattern from the blue glitter foam sheet.
- Cut out two small rectangles from blue glitter foam sheets.
- Cut small U-shapes from black foam sheet.
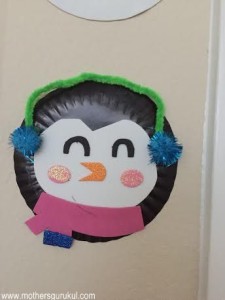
How to make Penguin:
- Paint the outer side measuring one inch of a paper plate in black color.
- Use the “U” shape cut outs from the black foam sheets to make eyes. Place it upside down.
- Cut an oval from the orange glitter foam sheet and on one end of the oval make two slits.
- Put the oval with slits for the nose horizontally.
- Use two small pink circles for cheeks.
- Make a rectangle 5inches long from a pink color foam sheet and put it horizontally. Cut two more small rectangles one inch long and put them vertically below the long horizontal rectangle to make it look like a muffler.
- Use the blue glitter rectangles to decorate the muffler ends.
- Lastly take a green fuzzy stick and bend it little in U-shape and stick them to the sides and add poms poms to give it a funky look.
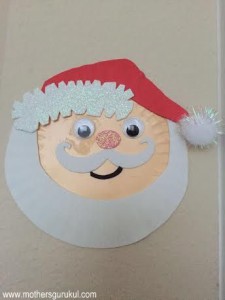
How to make Santa:
- For Santa’s face, paint the paper plate in Skin color.
- Use wobbly eyes. Add pink circle for the nose.
- Cut out a moustache shape from white foam sheet and plate right under the pink nose.
- Cut out a broad “U” to make Santa’s lips and place it under the moustache.
- For Santa’s hat, use the red foam sheet and stick it.
- Use your creativity to further decorate the hat. We added a white pom pom at one end of the hat.
- For Santa’s beard, cut out broad “U” from paper plate or white foam sheet.
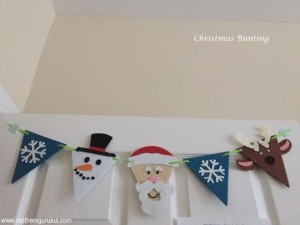
Christmas Bunting
Material required:
- Foam sheets – 3 or 4 colors
- Wobbly eyes
- Ribbon: for hanging the foam sheets pieces
- Paper punch
Let’s make the bunting:
- Cut the foam sheets in triangles depending upon he number of pieces you want to hang. We made a Christmas Bunting so we picked snowflake, Santa, reindeer and snowman. You can choose your colors according to the theme.
- Punch two holes on two ends of the foam sheets. You will be using these holes to let the ribbon go through them.
- Decorate your foam triangles according to your wish and theme. Christmas in our project.
- Hand these triangle by letting the ribbon through the holes.
- You can follow the same process and change your kid’s room decor as per the season or his/her favorite cartoon character.
- You beautiful bunting is ready!!
So, mommies of busy toddlers, I hope today’s guest post might have added another fun project in your craft bucket that you can do with your child.
